ABOUT THE GIT:*
Git is a distributed revision control and source code management system with an emphasis on speed. Git was initially designed and developed by Linus Torvalds for Linux kernel development. Git is a free software distributed under the terms of the GNU General Public License version 2.
This blog explains how to use Git for project version control in a distributed environment while working on web-based and non-web-based applications development.
Features of Git:
Some remarkable features of Git are as follows:
•Open Source: Git is an open-source tool. It is released under the GPL (General Public License) license.
•Scalable:
Git is scalable, which means when the number of users increases, the Git can easily handle such situations.
•Distributed:
One of Git's great features is that it is distributed. Distributed means that instead of switching the project to another machine, we can create a "clone" of the entire repository. Also, instead of just having one central repository that you send changes to, every user has their own repository that contains the entire commit history of the project. We do not need to connect to the remote repository; the change is just stored on our local repository. If necessary, we can push these changes to a remote repository.
•Security:
Git is secure. It uses the SHA1 (Secure Hash Function) to name and identify objects within its repository. Files and commits are checked and retrieved by its checksum at the time of checkout. It stores its history in such a way that the ID of particular commits depends upon the complete development history leading up to that commit. Once it is published, one cannot make changes to its old version.
•Speed:
Git is very fast, so it can complete all the tasks in a while. Most of the git operations are done on the local repository, so it provides a huge speed. Also, a centralized version control system continually communicates with a server somewhere. Performance tests conducted by Mozilla showed that it was extremely fast compared to other VCSs. Fetching version history from a locally stored repository is much faster than fetching it from the remote server. The core part of Git is written in C, which ignores runtime overheads associated with other high-level languages. Git was developed to work on the Linux kernel; therefore, it is capable enough to handle large repositories effectively. From the beginning, speed and performance have been Git's primary goals.
•Branching and Merging:
Branching and merging are the great features of Git, which makes it different from the other SCM tools. Git allows the creation of multiple branches without affecting each other. We can perform tasks like creation, deletion, and merging on branches, and these tasks take a few seconds only.
•Data Assurance:
The Git data model ensures the cryptographic integrity of every unit of our project. It provides a unique commit ID to every commit through a SHA algorithm. We can retrieve and update the commit by commit ID. Most of the centralized version control systems do not provide such integrity by default.
•Staging Area:
The Staging area is also a unique functionality of Git. It can be considered as a preview of our next commit, moreover, an intermediate area where commits can be formatted and reviewed before completion. When you make a commit, Git takes changes that are in the staging area and make them as a new commit. We are allowed to add and remove changes from the staging area. The staging area can be considered as a place where Git stores the changes. Although, Git doesn't have a dedicated staging directory where it can store some objects representing file changes (blobs). Instead of this, it uses a file called index.
•Maintain the clean history:
Git facilitates with Git Rebase; It is one of the most helpful features of Git. It fetches the latest commits from the master branch and puts our code on top of that. Thus, it maintains a clean history of the project.
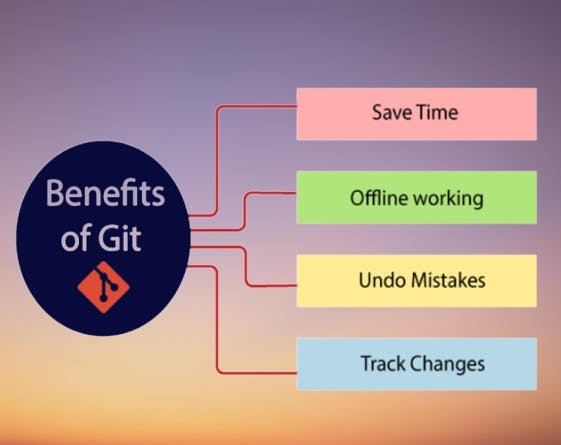
Benefits of Git:
A version control application allows us to keep track of all the changes that we make in the files of our project. Every time we make changes in files of an existing project, we can push those changes to a repository. Other developers are allowed to pull your changes from the repository and continue to work with the updates that you added to the project files.
Some significant benefits of using Git are as follows:

•Saves Time:
Git is lightning fast technology. Each command takes only a few seconds to execute so we can save a lot of time as compared to login to a GitHub account and find out its features.
•Offline Working:
One of the most important benefits of Git is that it supports offline working. If we are facing internet connectivity issues, it will not affect our work. In Git, we can do almost everything locally. Comparatively, other CVS like SVN is limited and prefer the connection with the central repository.
•Undo Mistakes:
One additional benefit of Git is we can Undo mistakes. Sometimes the undo can be a savior option for us. Git provides the undo option for almost everything.
•Track the Changes:
Git facilitates with some exciting features such as Diff, Log, and Status, which allows us to track changes so we can check the status, compare our files or branches.
Why Git? We have discussed many features and benefits of Git that demonstrate the undoubtedly Git as the leading version control system. Now, we will discuss some other points about why should we choose Git.
Interactive rebase in Sourcetree Git’s interactive rebase lets you rewrite your repository’s history. Here’s how to do it using Sourcetree. Some developers regard Git’s rebase feature as mysterious – even dangerous! While inexpert rebasing can, indeed, cause annoying problems for your teammates, rebase done right is perfectly safe. It’s also a handy way to clean things up before pushing to origin or merging back into master. But ‘mysterious’? No need for that.
In this post, I’ll provide a brief overview of rebase and its cousin, interactive rebase. Then, we’ll dive into interactive rebase using Sourcetree (a free UI tool for working with Git commands) and the operations you can perform during it: squash, edit, delete, reword, and reorder. Rebase vs. interactive rebase: You may have heard terms like “rewriting history” or “replaying your commits” in the context of rebasing, which can be confusing if you’re new to Git. Essentially, rebase is a way of changing your commit history.
But why call the operation “rebase”? It’s because rebase lets you choose a new base commit to serve as the starting point for your feature branch. You can also rebase against a commit on your current branch, then reapply (or “replay”) subsequent commits on top of that. Basic rebase is a good idea when you’re about to merge into master, and master has progressed since you branched off of it. By reapplying all your branch commits onto a different base commit, you flush out merge conflicts before you go to perform the actual merge. And if you kick off a test run against your rebased branch (which you would totally do because you’re conscientious, right?), you can discover integration issues before pushing your changes to origin. Interactive rebase is a variation that lets you tidy up your commit history before merging or pushing to origin. Changing the commit history lets you apply 20/20 hindsight to the description of the steps that you took to get to this change. Git has a special file called git-rebase-todo which is simply a text file containing a list of the commits you’re working with. Interactive rebase offers a chance to edit this file and gives you some control over exactly what happens when you replay those commits.
Interactive rebase using Sourcetree If you’re doing an interactive rebase from the command line, Git will open an editor where you can issue the commands that result in edits to git-rebase-todo – which is sort of like a runbook that Git will use when executing the rebase. Similarly, Sourcetree taps into git-rebase-todo and edits it. The difference is the user experience: you get to interact with the rebase through a point-n-click UI instead of having to memorize commands and their syntax. There are two ways to start an interactive rebase in Sourcetree. The first is to right-click (or context-click) on a commit and choose Rebase children of interactively. The second is to pull down the Repository menu and select Interactive rebase. From there, you’ll have the chance to rewrite your repository’s history with the help of a few operations. Let’s walk through each one.
Avoiding confusion during interactive rebase Mine vs. Theirs Let’s say you’ve deleted a commit, and Git is now replaying subsequent commits. Let’s also say one of those subsequent commits affects a file that was changed as part of the commit you deleted. Git won’t know which version of that file to replay the other commits on top of, so it has to ask you: mine or theirs?
In this case, mine refers to the changeset just prior to the commit you deleted, and theirs refers to the changeset just after the commit you deleted. If you choose mine, you’ll lose all the changes made to that file after the deleted commit. Proceed thoughtfully in this situation, and don’t rush through it. But even if you do make a mistake here, you can still reset your repository as long as you don’t push the changes.
Rebasing upstream commits I said it above, but it bears repeating: never rebase commits that have already been pushed. This can lead to dangerous and confusing situations.
If you rebase pushed commits, Sourcetree will tell you that you have changes to pull down after you’ve finished the rebase. This is really confusing if you know you’ve pulled all the changes already. Here, again, you can save your team from experiencing this confusion by resetting your repo as long as you don’t push these changes.
